Step 3: Prepare Content
Step 3: Prepare Your Web Application Data
In order to upload your data to our transfer system, you must condense your current web application directory and backup your current database. There are many ways to collect the data your current hosting provider has hosted. We have listed a few ways in this section to help aid in receiving this data.
- Creating a backup with cPanel "Paper_Lantern Theme"
- Creating a backup with cPanel "x3 Theme"
- Creating a manual directory backup via FTP
- How to create a manual database backup via phpMyAdmin
Please keep in mind that only the file types below are expected by our transfer system.
Accepted fil types:
.7z | .gz | .gzip | .rar | .tar | .tar.gz | .tgz | .zip | .sql
Option 1: Creating a backup with cPanel "Paper_Lantern Theme"
Below are the instructions on creating a usable backup in cPanel's Paper_Lantern Theme:
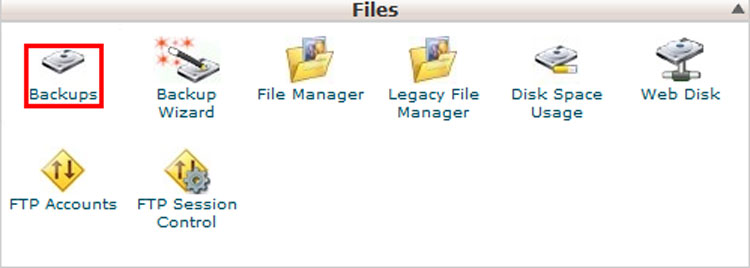
The Backups menu in the Files section generates backups:
- Home Directory (Data for your web application)
- MySQL database
To create a full cPanel backup includes all account files, databases, and other various settings.
We recommend creating a full cPanel backup for our migration process.
Step 1: Navigate to your cPanel > Files section > Backup menu:

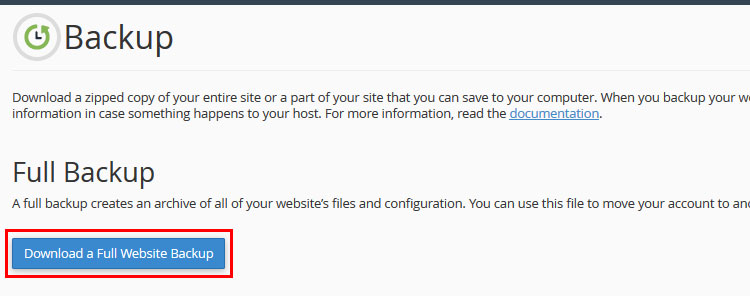
Step 2: Click on Download a Full Website Backup:
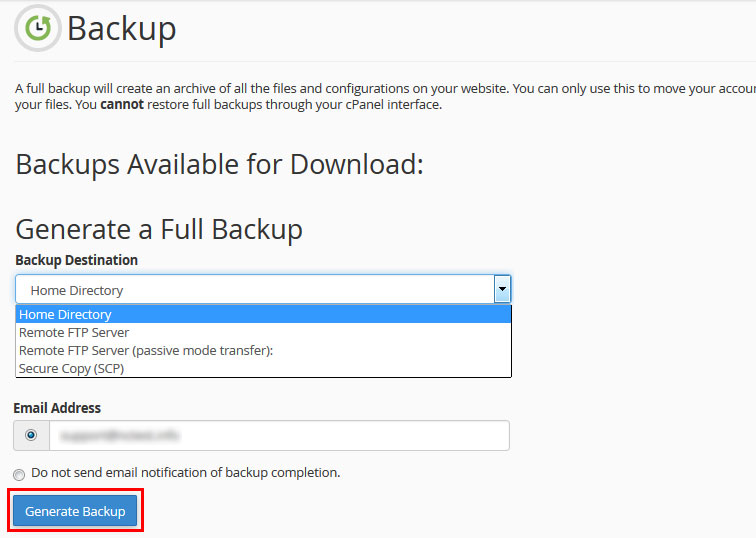
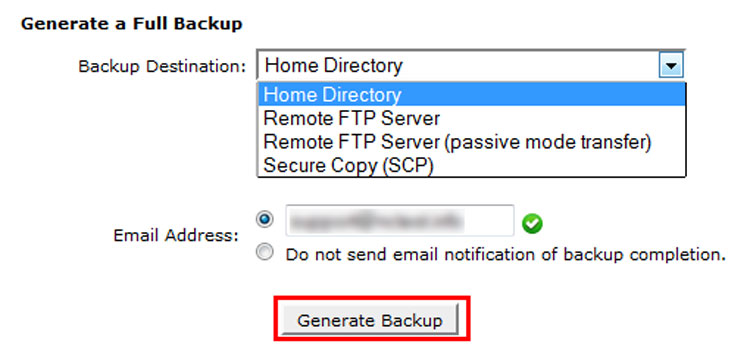
Step 3: By default, a full cPanel backup will be saved into your account home directory.
Go ahead and change Backup Destination if you would like to choose another target location for the backup.
Click on Generate Backup to proceed:
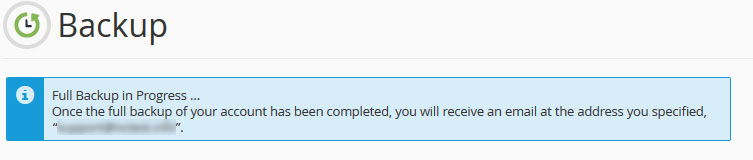
Step 4: You will see the following message notifying about the start of the backup generation process:
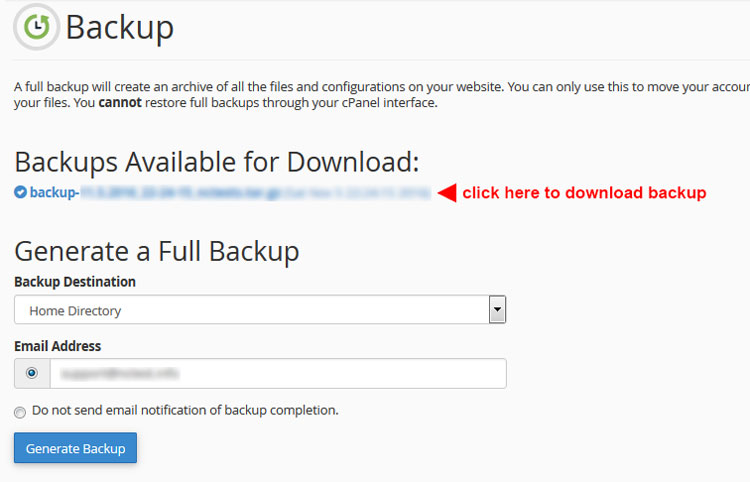
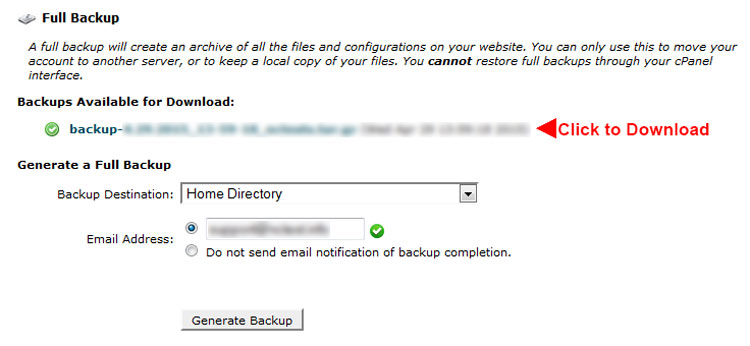
Step 5: Click on Go Back to monitor the status of the generation process real time.
The green checkmark next to the backup name will indicate that the backup generation has been completed.
You can now either download it or navigate to the remote server to see if the backup is there:
Your backup has been complete and is now ready to be uploaded to FullSail System
Back to topHow to uplaod to FSS Transfer System
Option 2: How to create usable backups in cPanel "x3 Theme"
Below are the instructions on creating a usable backup in cPanel's x3 Theme:
The Backups menu in the Files section generates backups:
- Home Directory (Data for your web application)
- MySQL database
To create a full cPanel backup includes all account files, databases and other various settings.
We recommend creating a full cPanel backup for our migration process.
Step 1: Navigate to your cPanel > Files section > Backup menu:
Step 2: Click on "Download or Generate a Full Website Backup"

Step 3: By default, a full cPanel backup will be saved into your account home directory.
Go ahead and change Backup Destination if you would like to choose another target location for the backup.
Click on Generate Backup to proceed:
Step 4: You will see the following message notifying about the start of the backup generation process:

Step 5: Click on Go Back to monitor the status of the generation process real time.
The green checkmark next to the backup name will indicate that the backup generation has been completed.
You can now either download it or navigate to the remote server to see if the backup is there:
Back to topHow to uplaod to FSS Transfer System
Option 3a: Creating a manual directory backup via FTP
The manual backup is another good option to submit your Web Application for the FSS Onboarding Process. In this example we are going to use a base CMS based site simular to WrdPress.
Step 1: Download, Install, and Setup FTP Client
This data is located in the home directory of your current host. You can access these files with of an FTP client. We will be using a popular FTP client called FilzZilla.
To connect to your current host's server please refer to their documentation.
If you need more information on how to setup the FileZilla Client please visit this link.
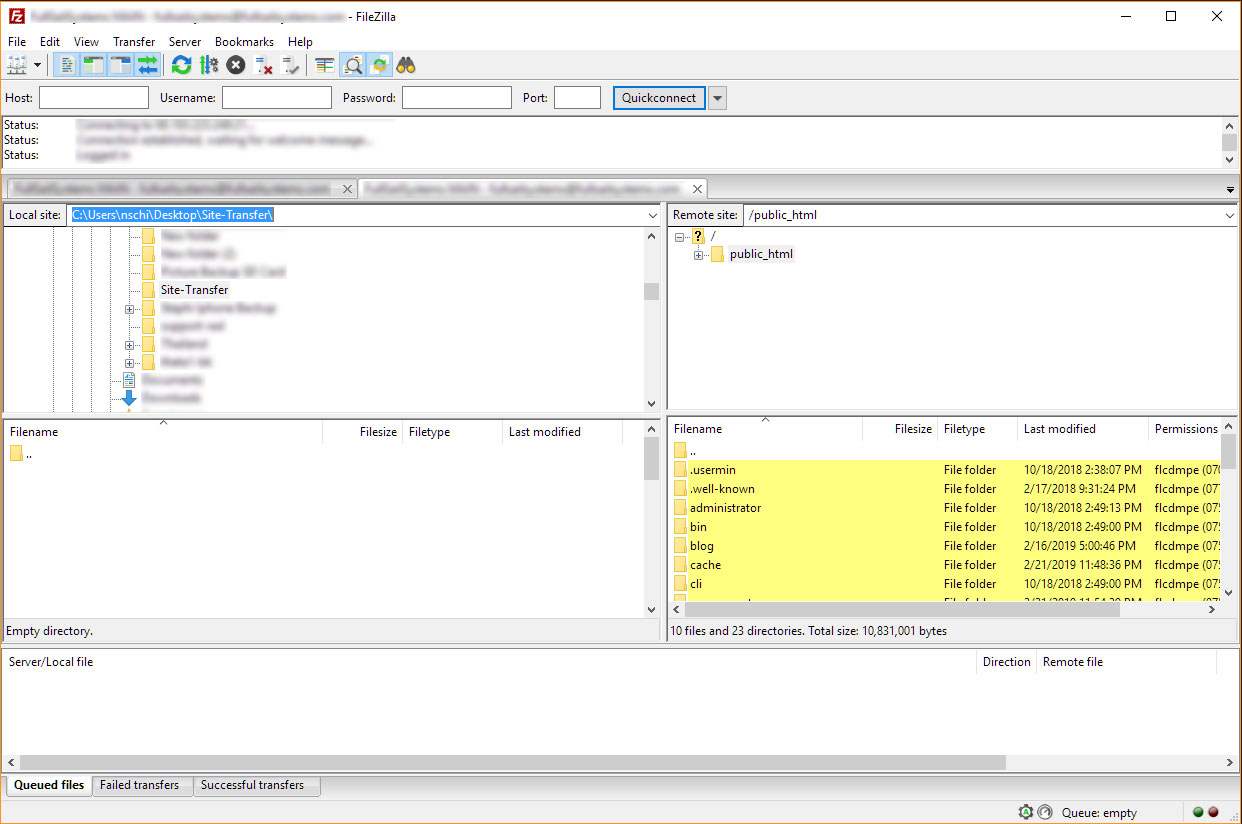
Once you have installled and filled in your current hosts FTP details you should see a screen like this:
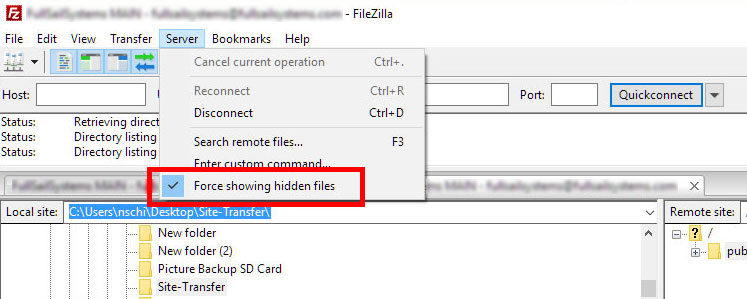
Step 2: Make sure that your FTP client shows all files (including the hidden files).
You can do this in FileZilla by navigating to Server > Force showing hidden files.
Step 3: Download data from your home directory FTP Client
Before you begin to download your date you must create a directory on your hard drive for the data to be placed. This directory will be will hold all the content from you website so please be sure that this location has enough free space to accept all of the data.
The left portion of the screen will be your local computer directory. Please navigate to the directory you have previously created.
The right portion of the screen will be the Servers defined FTP directory based on user permissions. This section holds the data that is located on the server.
In most cases you the FTP server will restrict you to the public directory but not in every situation. If you are not sure which directory to download here is a list of some examples of public directories:
/var/www
/home/”your-domain”/public_html
/var/www/html/
To transfer all of these files you should (Shift + Select) all files and directories in the public directory and the manually drag them to your newly created local directory.
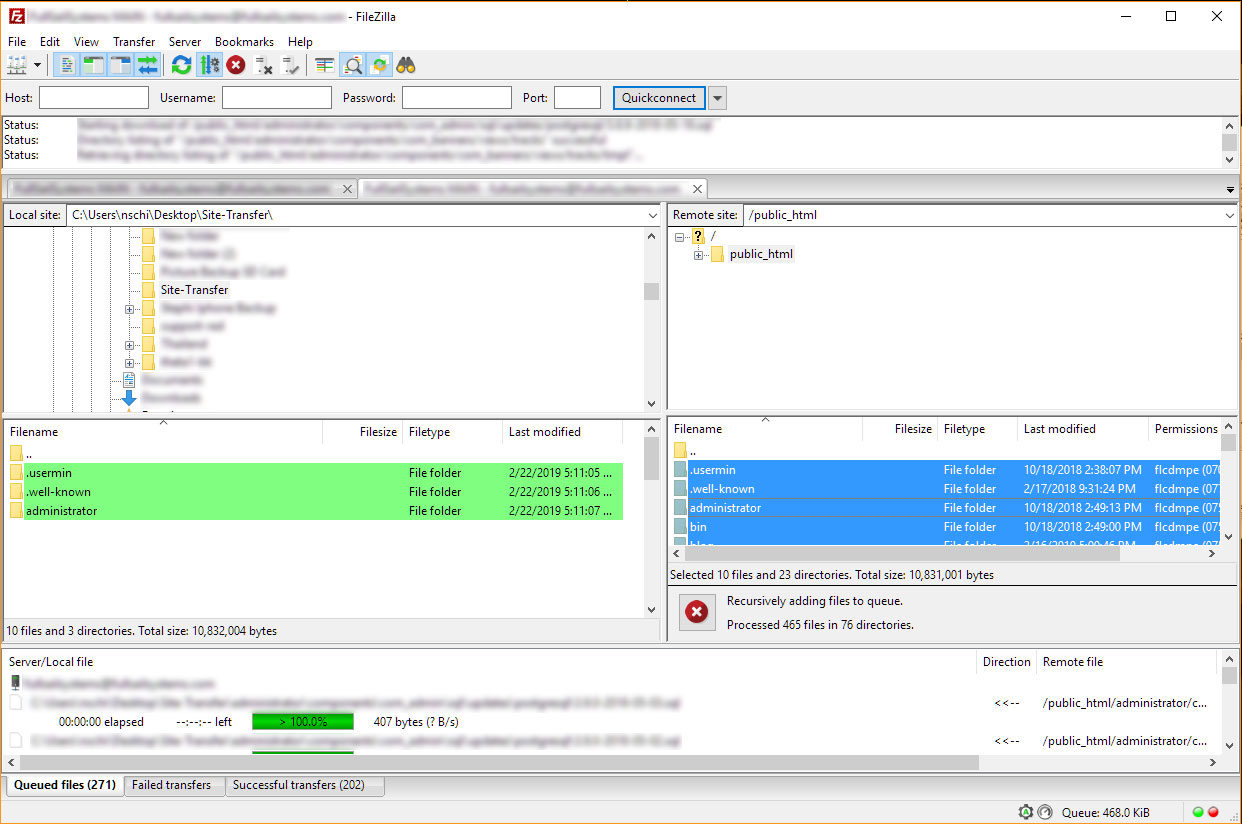
Your data will now start to transfer on-to your local machine.
Once this process has completed you can zip/archive the newly created directory and it is ready to be uploaded to the FullSail Systems onboarding transfer system.
Back to topHow to uplaod to FSS Transfer System
Option 3b: How to create a manual database backup via phpMyAdmin
To back up your web application's database follow these simple steps:
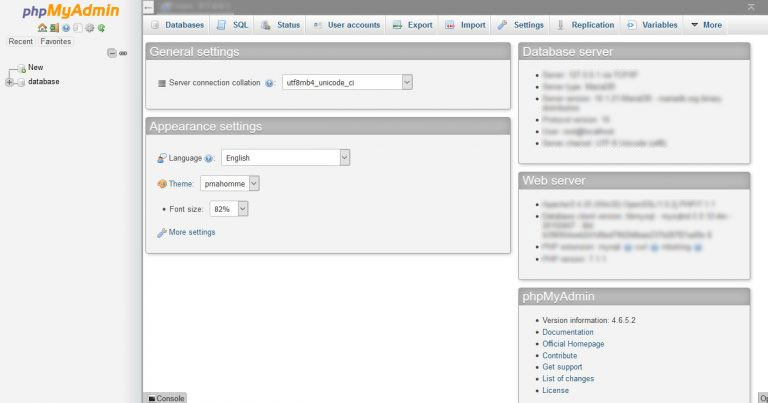
Step 1: Login to the database management panel of your current hosting platform
Typically phpMyAdmin is used and once you login you will be presented a dashboard that should resemble something simular to this:
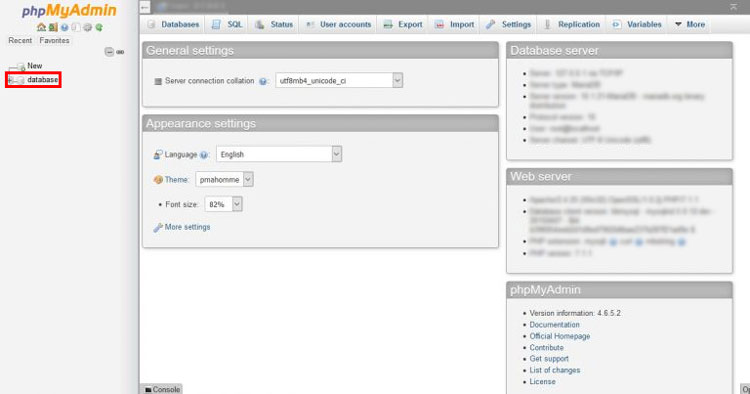
Step 2: Selected the proper database
Select the apporate database on the left hand side of the screen.
In this example the database is called “database” and a simple click will do it.
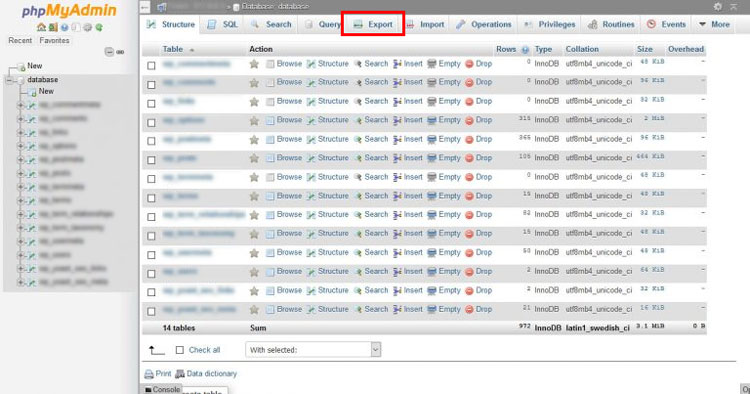
Step 3: Selecting the export feature
Once you have entered the database, select along the top “export”
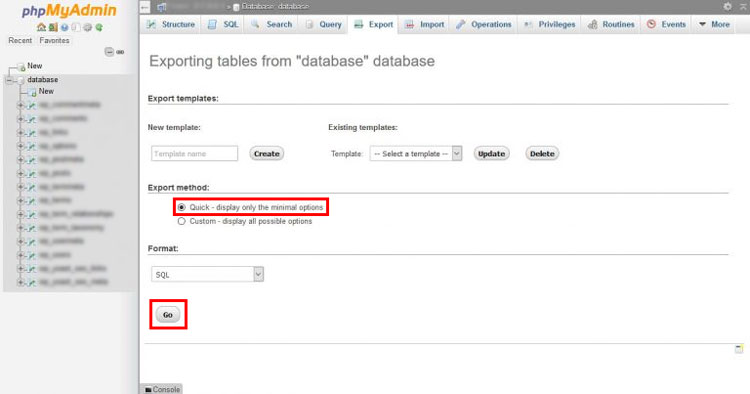
Step 4: Selecting which export method to use
There are two export mehtods that can be used here in this section. We highly recommond to use the "Quick Export" method but for more advanced users with larger databases the "Custom" Expert can also be accepted.
Quick Export (Recommended):
You from this point can simply select “Quick” and then the “go” button. An uncompressed database will be downloaded onto your local system.
This solution is suitable small databases as it doesn’t compress them before download.
 You now are ready to upload this database to FullSailsystems onboarding transfer system.
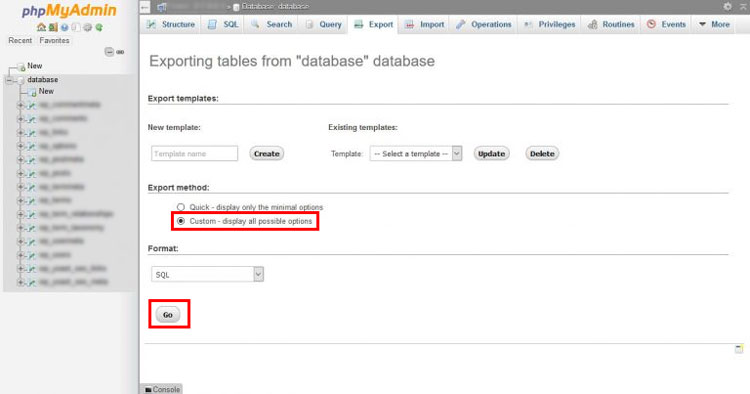
Custom Export:
USE AT YOUR OWN RISK
You can select “Custom” and then the “go” button. You will be prompted with some additional options. This method is suitable if you have a large database and the ability to compress the database before download.
This option can also simplify a database that servers more than one website utilizing different prefixes.
Additional Setups for a Custom Export
Please review the example screen shots below. If you are not sure what to select please contact [email protected] for some additional support
Make sure to select SQL under the Format Option and in the Tables section make sure to select all database tables.
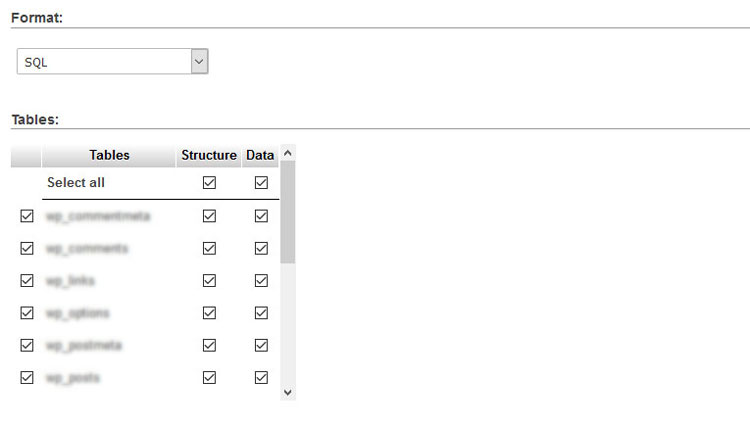
In the Output section select the compression method “gzip”.
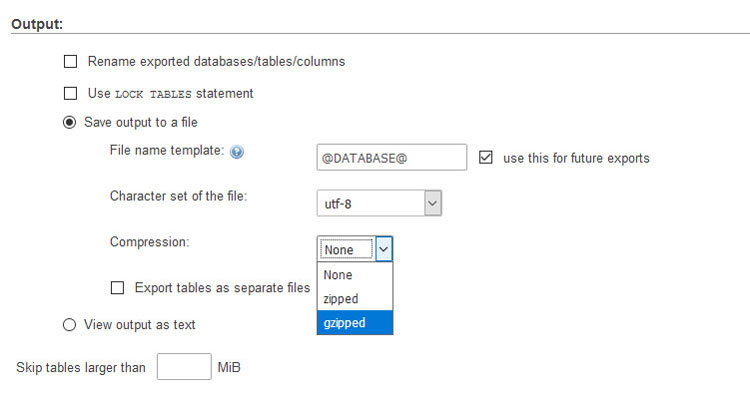
Object Creation Options will allow for some additional customization.
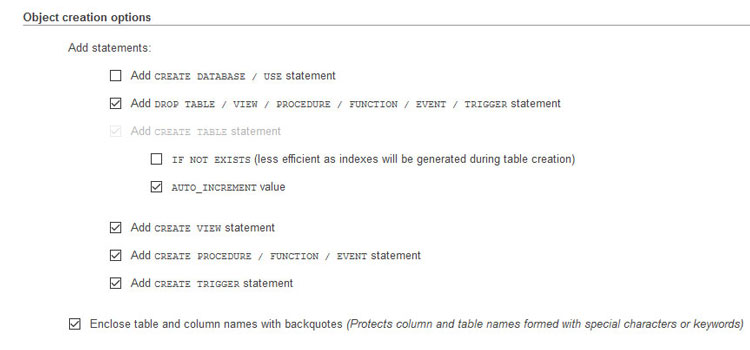
You now are ready to upload this database to FullSailsystems onboarding transfer system.